Xcode Projects
🎯 Learning Goals
- Navigate the Xcode Project application
📗 Technical Vocabulary
- StoryBoard
- Navigation Pane
- Utilities Pane
- Debug Area
- Simulator
🌎 Xcode Projects
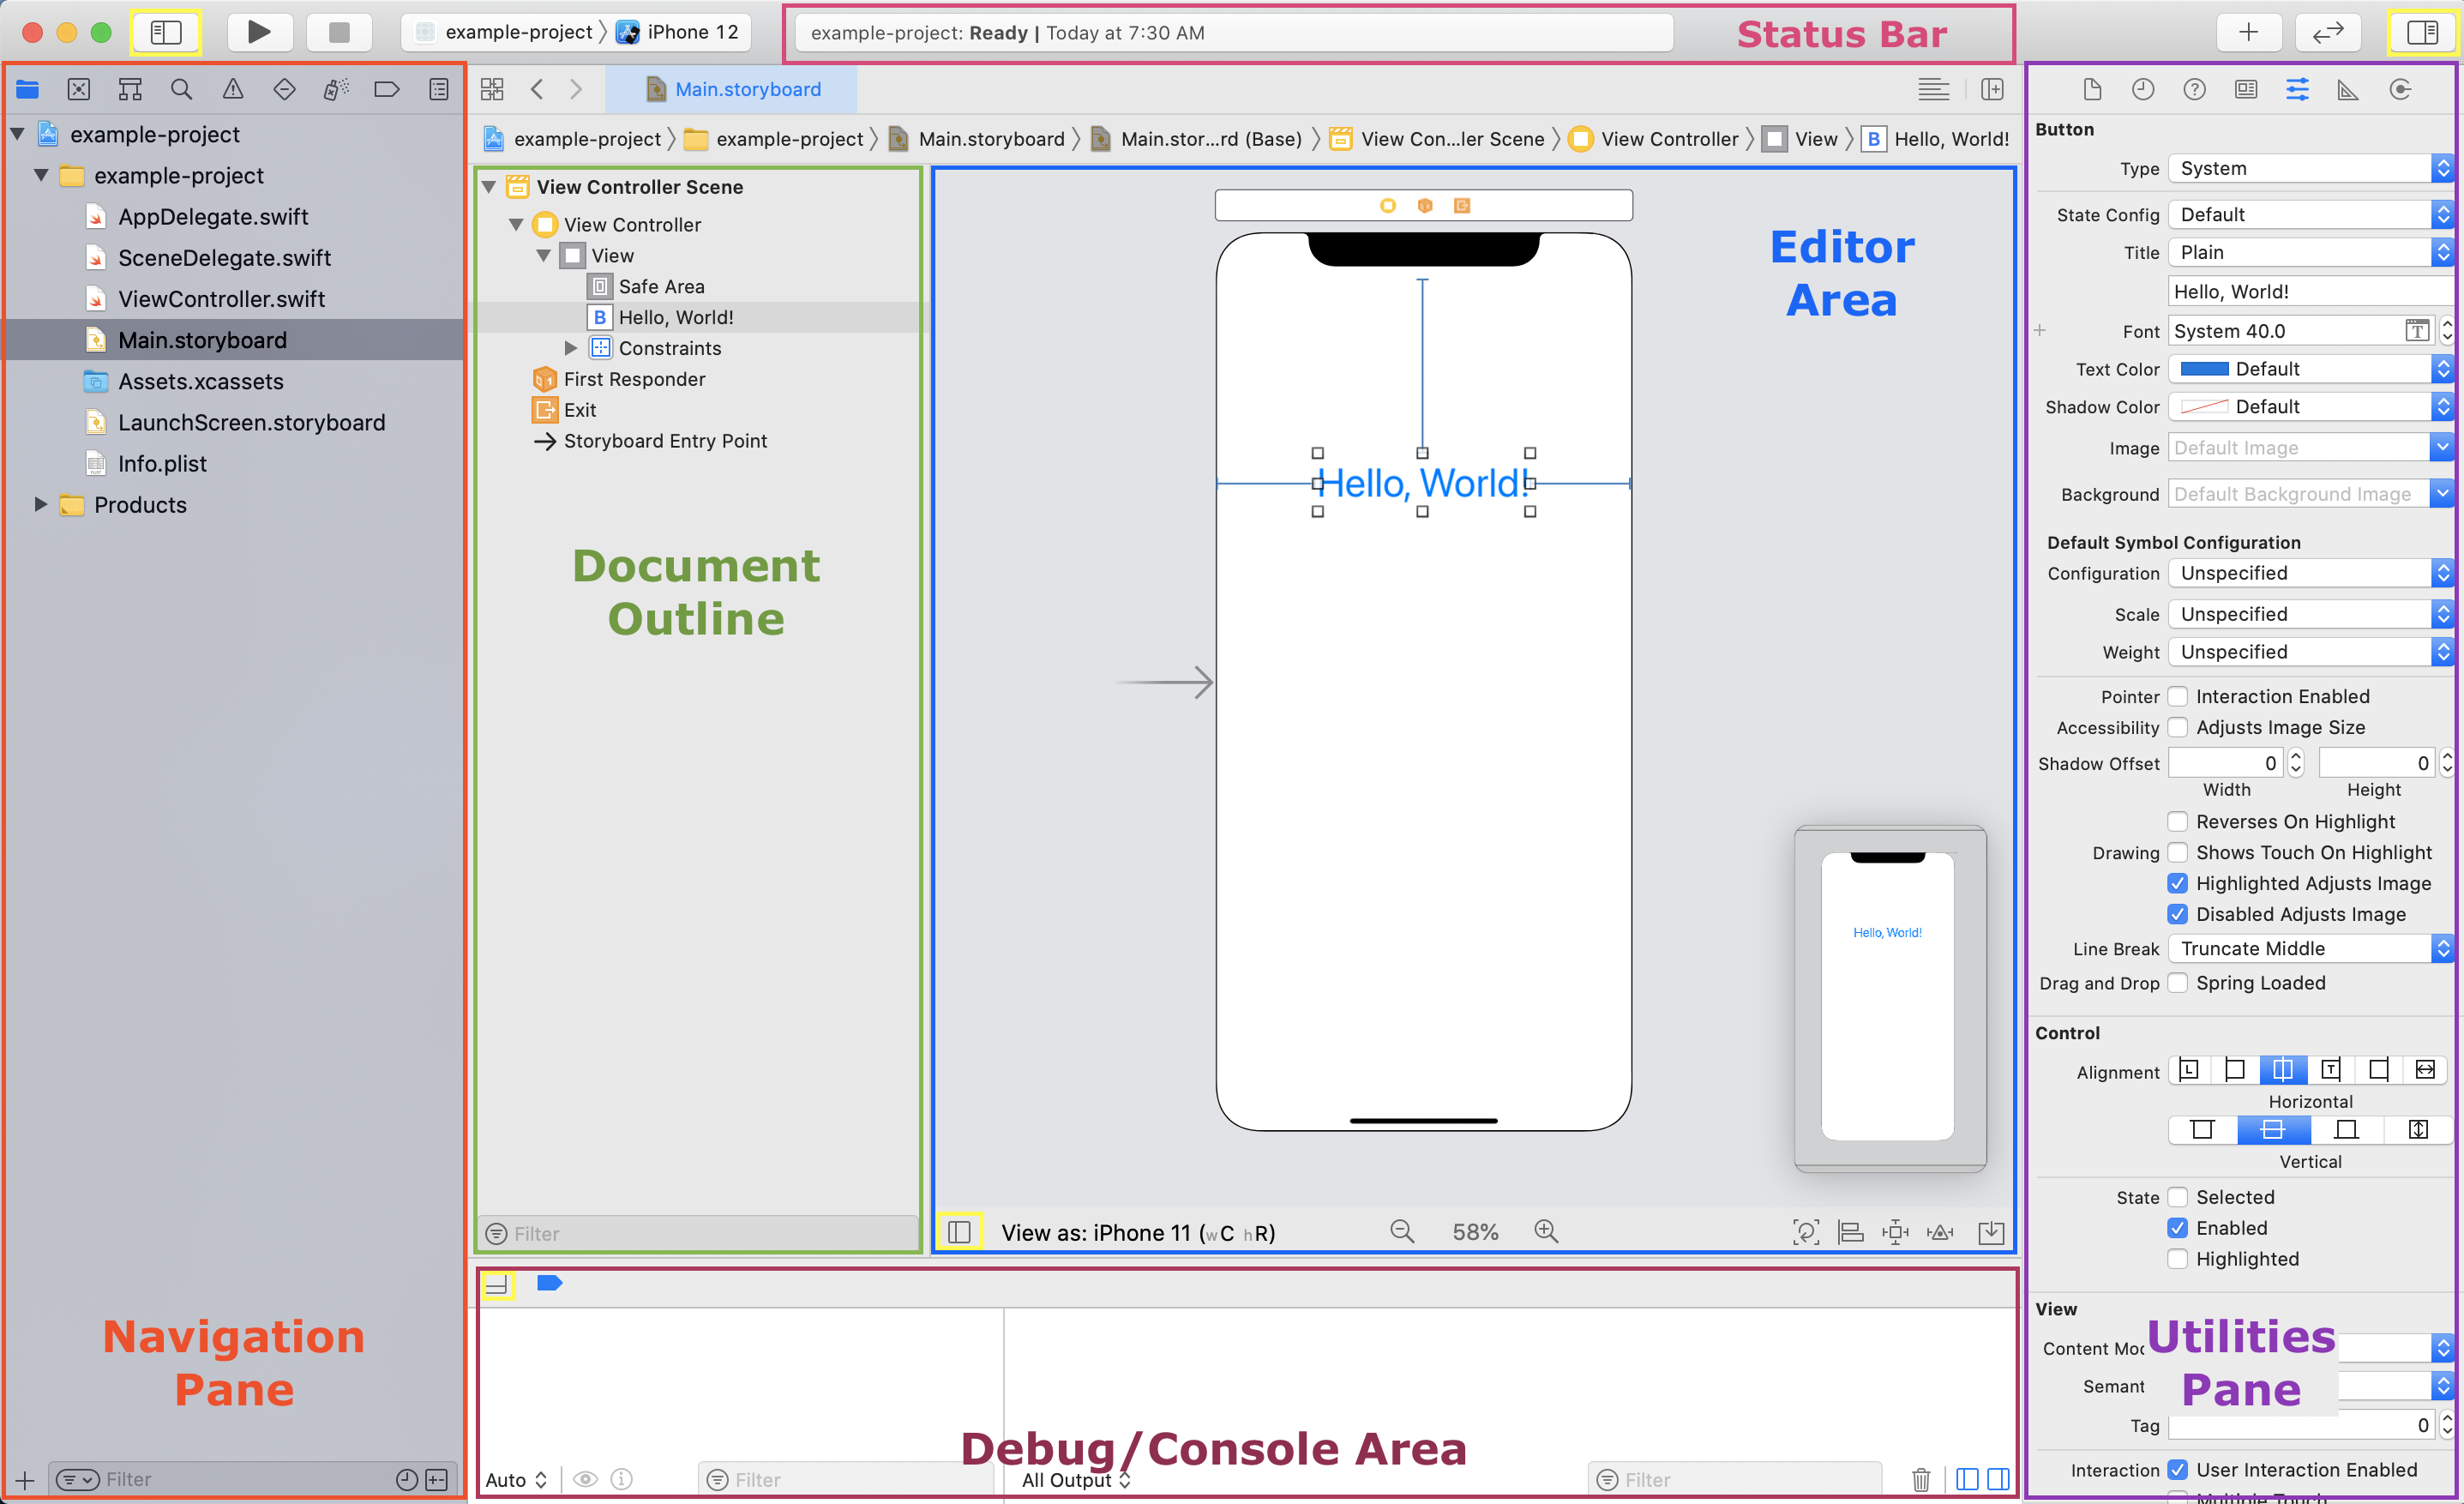
Up until now, we’ve mainly worked in repl.it, which is a great place to run code, but not usable to build real iOS apps. Xcode Projects is a place where we can! A lot more than writing code goes into building an iOS app, but we can do it all in Xcode. It is a big challenge that utilizes a lot of different tools; so we will take it one step at a time. Here’s a map of the main features in Xcode.
Your Instructors or IAs can now screenshare and show you the main features highlighted in the map above, or you can watch this video:
🐣 Scavenger Hunt
Follow the steps below to practice navigating Xcode Projects!
- Create a new iOS App
- Name it, and make sure to select “Storyboard” for the Interface Dropdown, “UIKit App Delegate” for the Life Cycle, and Swift for the language. No need to check “Use Core Data”!
- Navigate to the Main StoryBoard
- View your StoryBoard on an iPhone 12 Mini
- Run the simulator on an iPhone 12 Mini
- Collapse/hide the Navigation Pane
- Expand the Console/Debug area
- Expand the Navigation Pane
- Navigate to the
ViewController.swiftfile - On line 14 of that file, remove “// Do any additional setup after loading the view.” and replace it with:
print("\r ======== \r Testing, testing! \r ========= \r") - Re-run the simulator
- Look for the print statement in the Console/Debug area
- Collapse the Utilities Pane
- Collapse the Navigation Pane
- Expand the Utilities Pane
- Expand the Navigation Pane
- Navigate to the Main StoryBoard
- Change the orientation of the iPhone 12 Mini on the StoryBoard
- View your StoryBoard on an iPhone 11 Pro